. And though I missed out on those sadly (consider this my unapologetically overt plea for her to make more),
 |
| Lea shows off a watermelon from her CSA |
Name: Lea Rude
Home / Hometown Swap: El Cerrito, San Francisco
Profession: Librarian
How did you first get involved in food swapping?
How long ago?
I first heard about SF
Swappers from my friend, Christina Moretta, and it sounded like it was right up
my alley. We had been doing a bit of casual home-made food trading over the
past couple of years and the swap sounded like a fun way to take it further. I
have been to the last two swaps.
What did you make for the last food swap and
what inspired your choice?
I made Candied Citrus
Peel and Pickled Red Onions. I had been curious about making candied citrus
peel since earlier this year when a friend served some home-made candied Meyer
lemon peel at a party (along with home-made limoncello!) I have a steady supply of Meyer lemons from our
backyard tree and I had some ruby red grapefruits and oranges on hand, so it
seemed like the time to do it. The red onions came in my CSA. I’m not a big fan
of raw onion so I decided to pickle them.
 |
| Pickled Red Onions for the swap |
What’s your favorite thing about swapping?
I really like the swap
itself. The social aspect is awesome and totally unique. I love talking to new
people and getting inspired by what everyone makes. It is a great way to get
ideas for new ways to cook. I love the potluck aspect and all of the tasting,
too. I go home stuffed and pumped up!
Who or what most influences your cooking?
My mom is definitely the
biggest influence and inspiration for me in the kitchen. She is an amazing cook
– she can make a tasty and satisfying meal from whatever happens to be in the
pantry, but she can also go home after a meal in a great restaurant and
recreate her favorite dish. Whenever I make something new or just really good I
get on the phone and tell my Mom all about it, and she does the same with me -
she is always turning me on to new ingredients and new approaches to cooking.
What’s your favorite kitchen tool?
I am currently working
out how I can make space for a permanent spot on the counter-top for my
blender. I have been using it a lot more since I started making salsas and it
keeps getting pulled out lately to make aguas frescas and smoothies.
 |
| Booty from Lea's CSA box |
Your current flavor or ingredient obsession?
The ingredients of my
CSA box. We started getting a box from Terra Firma Farms in January and it has
had a huge influence on my cooking. My approach to cooking in general has
always been to use what is on hand but this has taken it to another level. Every
week I have to figure out what to do with the bounty of produce that comes in,
sometimes including things I have never cooked before. It is so much fun!
 |
| Garlic Scapes |
Biggest food surprise?
A recent surprise was
garlic scapes. I just caught word of them a couple months ago on some canning
blogs, but I had never seen them before. I took a trip to Vermont last month
and saw them everywhere! Farmers markets, farmers stands, and in my friends’
CSA. At the CSA farm they had giant tubs of extra garlic scapes, so we made
grilled scapes and garlic scape pesto. They taste great but I think the most
surprising and delightful thing is their looks. They are so silly!
If the Rapture came tomorrow, what would your
last meal on earth be?
I am on a mostly
gluten-free diet, so if an asteroid were going to collide with the earth
tomorrow I would spend the day eating things on bread. Good butter,
triple-cream brie, homemade pesto, and all the homemade preserves in the house
on sweet baguette. Plus steamed artichokes and Dungeness crab with butter and
garlic.
When I'm not in the kitchen… I'm sewing, reading or walking the dog.
Favorite local food experience:
Backyard BBQs with
friends year round, fancy dinner at Camino in Oakland, casual lunch at Tacubaya
in Berkeley.
Recipes by Lea:
 |
| Candied Citrus Peel |
Candied Citrus Peel
When I decide to make
the candied citrus I trolled around online and read some recipes in cookbooks.
I did what worked with my schedule and used the techniques that sounded right.
Remove the peel in large
strips from 2 grapefruits, 3 oranges and 6-7 lemons, about 5 lbs. of fruit.
Large strips are best. Little pieces fall apart and get lost in the syrup.
Scrape or slice off any
pith that is left on the peel, but keep the white part. That gives it heft and
the bitterness and toughness is simmered out in the next step.
Cover the peels in cold
water and bring to a boil, then lower the heat and simmer for 10 minutes.
Drain, and repeat once, then repeat again but simmer for 15-30 minutes,
depending on how much time you have. Drain peels.
Combine 5 cups of sugar
and 5 cups of water, bring to a boil simmer for 10 to 15 minutes, then add the
peel and simmer for 45 minutes. Remove from the heat and let cool to touch.
Remove the peels from
the syrup and place on wire racks placed over cookie sheets or platters. Try to
keep the strips from touching each other. Let dry for 24 hours (a cold oven is
a good place to keep them out-of-the way and dust-free).
Put ½ cup sugar or
superfine sugar in a bowl (I actually pulsed regular sugar in a food processor
to make it finer). Roll the peels in the sugar to coat, then let dry for
another hour. These should keep for a couple of months at room temp in airtight
containers.
 |
| Candied Citrus Peel packages for the June swap |
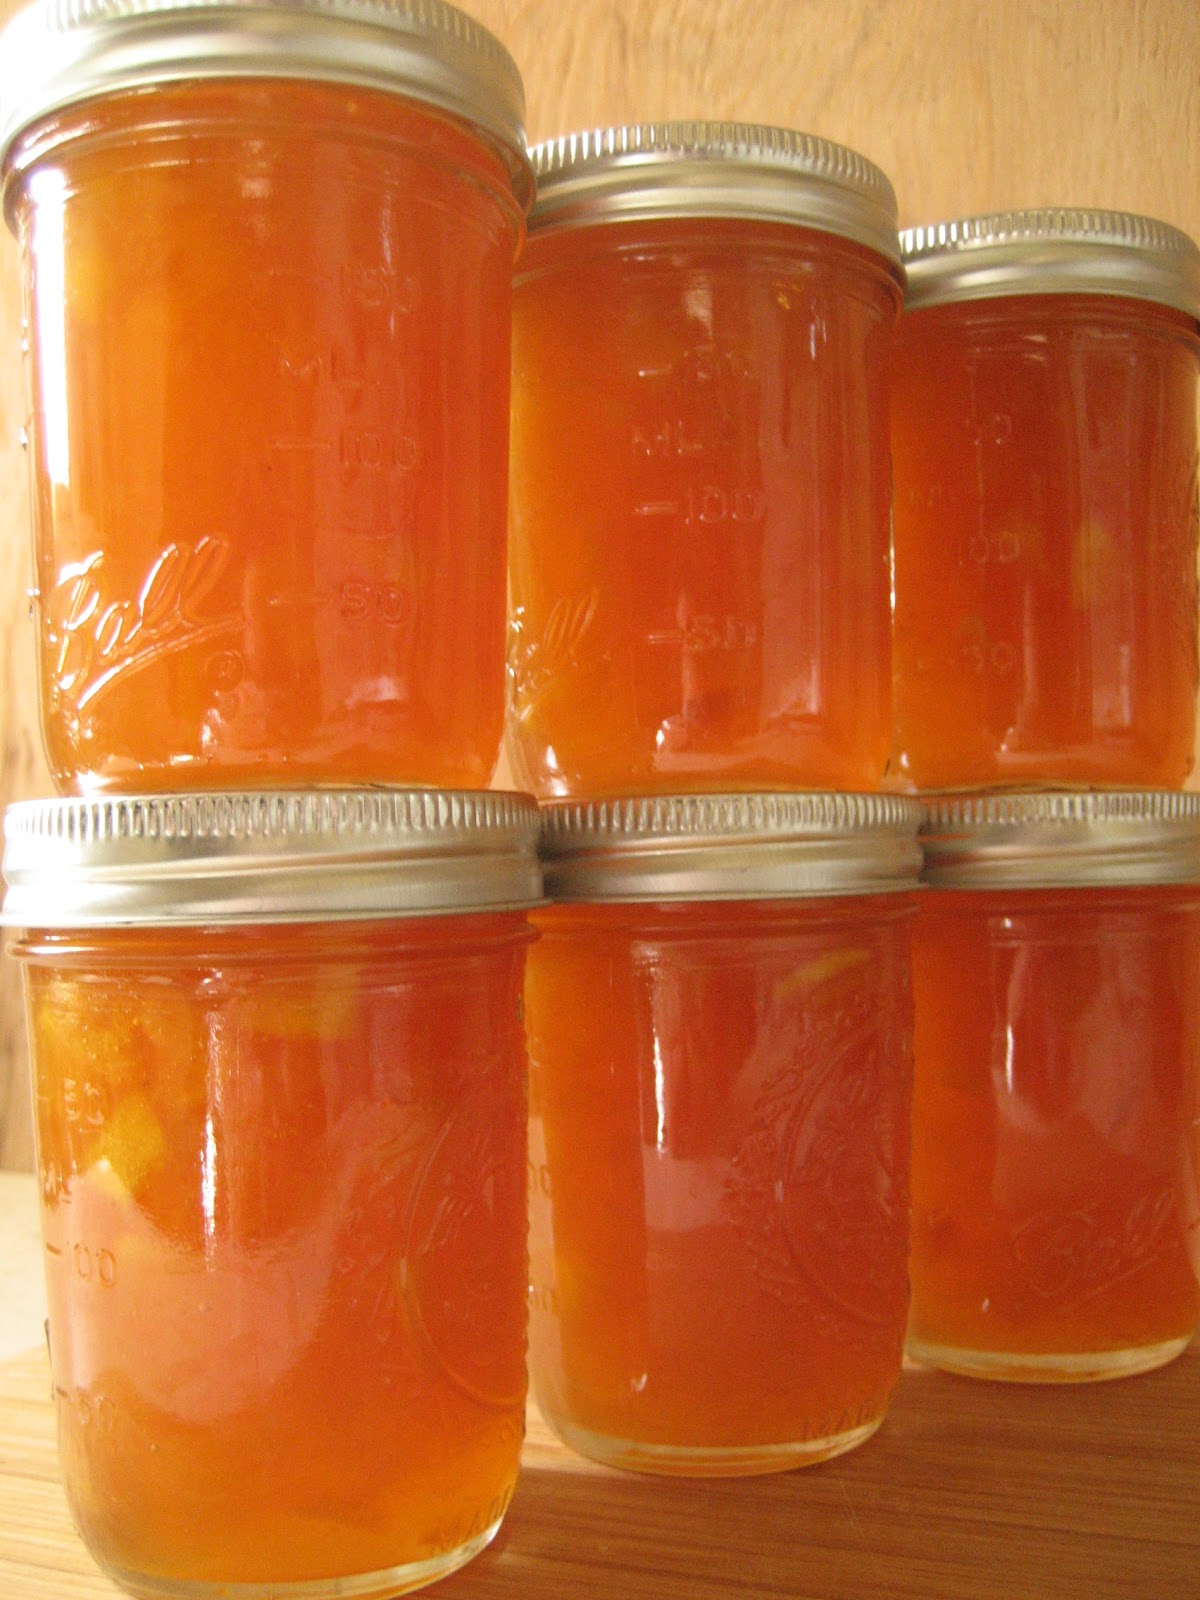
Citrus and Stone Fruit Jam
I had about 3 cups of syrup
left over from making the peels and I figured it would be a good base for a
small batch of jam. I had cherries, apricots and a peach from the CSA, so I
made this jam. It is my favorite jam ever! You can use any combo of fruit, but
definitely include the lemon – it makes a perfect sour, chewy addition to the
sweet jam.
Syrup left over from
making candied citrus peel (above)
3 apricots
1 peach
a handful of cherries,
pitted
1 Meyer lemon,
quartered, seeds removed, sliced thin (keep the skin on)
Cook all ingredients for
about 20 minutes. Put in a jar and refrigerate. Eat! Yum!