Showing posts with label jelly. Show all posts

Thursday, August 25, 2011

The Jam Diaries, Pt. 1

Dear Diary,

I have a confession. While I most definitely like jam — a lot, really — we just don't eat that much around our house. On my toast I tend to prefer just butter or the addition of something savory (and fatty) like cheese or ham. We do use it frequently for our stand-by dessert: plain yogurt with jam mixed in — but beyond that we tend to have jars rattling around the fridge for a good long time.

Garden full of roses at my sister's place
I have discovered the exception to this rule. As part of my recent jam/jelly-making mania, I found my secret sauce:
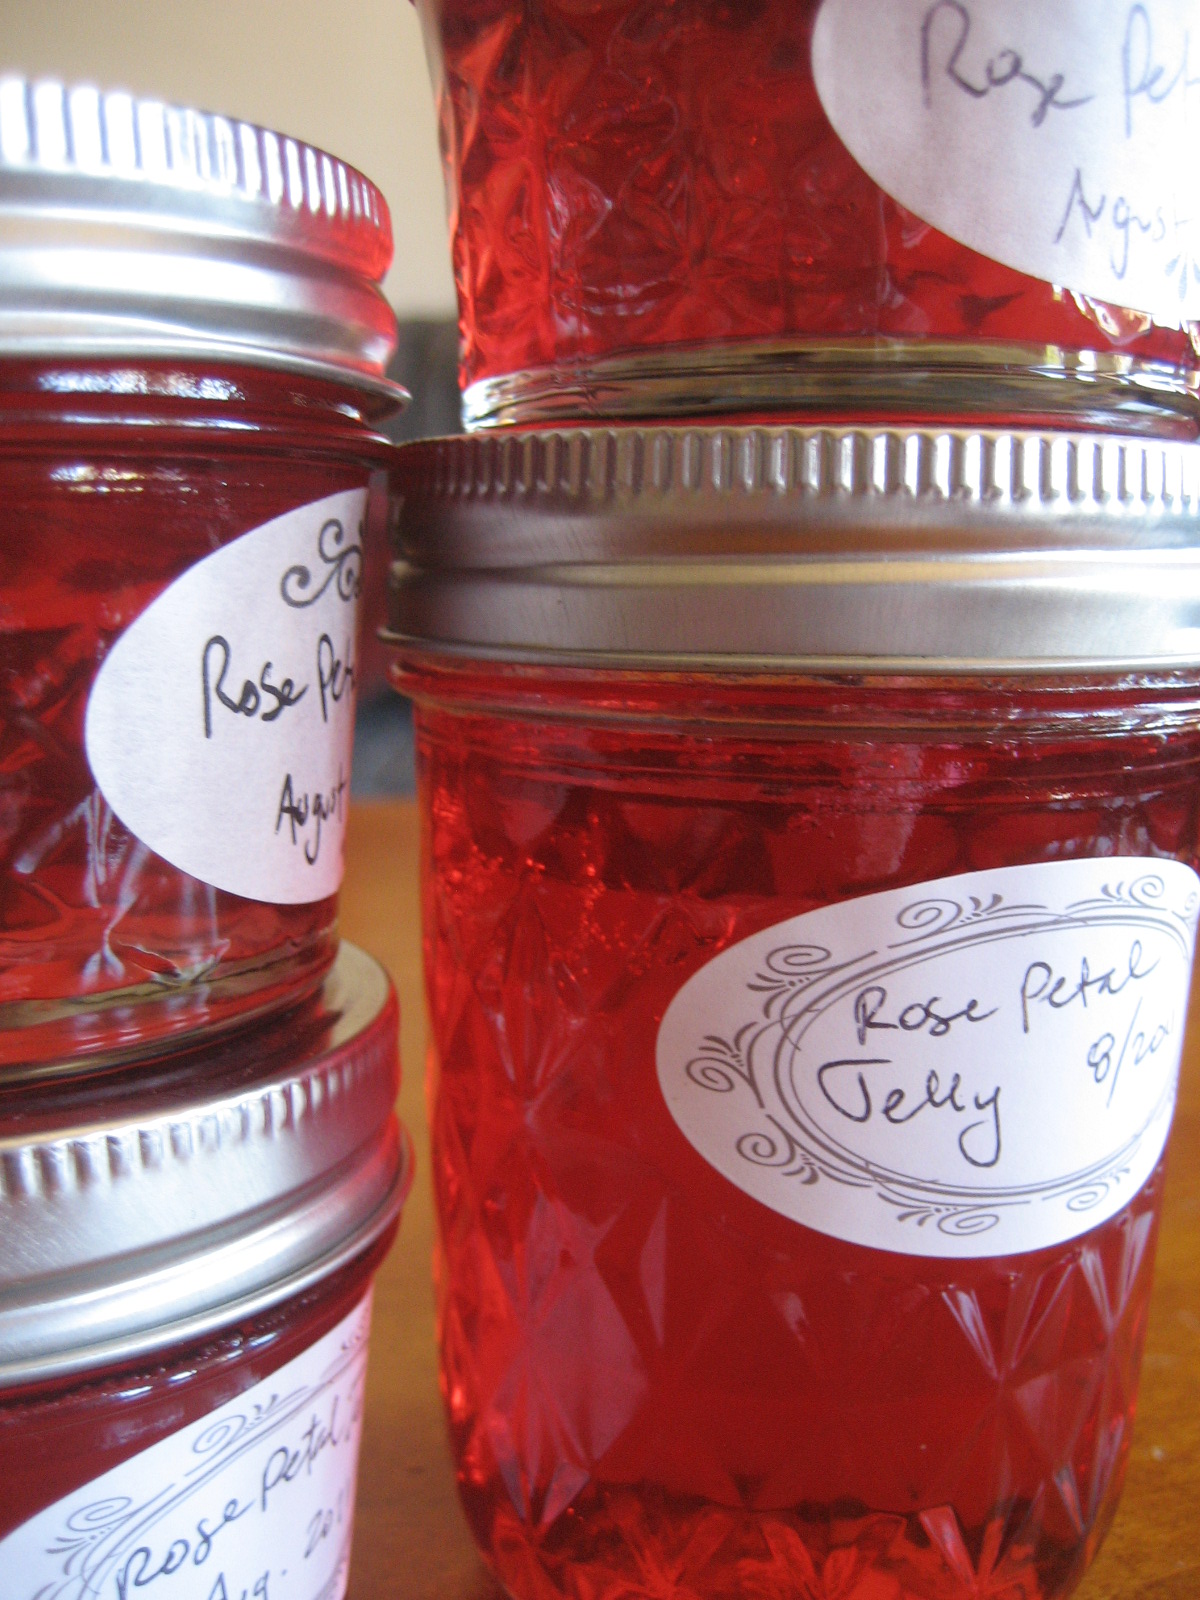
 rose petal jelly.

Inspired not least of all by the incredibly fragrant blue magenta roses that fill my sister's backyard in Berkeley, and by memories of floral jellies in France, I had been wanting to make something with roses for a while. After my sister brought me a bunch of roses, I did some online research and settled on this recipe - mostly because it required about the right amount of petals I had on hand.

Preparing the rose petals
A friend had also brought me a bouquet of garden flowers which included a gorgeous pink rose, so once I enjoyed its bloom for a few days, I added that into the mix. And my sister's harvest had included a single red long-stem rose that totally looked like it had come from a florist (but smelled divine) - key difference here being that it was grown in her yard, organically and without pesticides. This is crucial if you are using rose or flower petals for cooking - you must use pesticide-free ingredients!

After removing the petals from all the roses, you wash them and trim off the bottom white part of the petal which can turn your creation bitter if used. This is the kind of jelly prep you dream of right? Snip, into the measuring cup, voila.

After steeping the petals in boiled water for 10 minutes, you strain the liquid, squeezing every precious drop of fragrant goodness from the petals. Apparently your infusion can at this stage have turned a muddied color, which magically is transformed with the addition of the lemon juice, but mine was actually already a lovely red/pink color strangely evocative of Hawaiian Punch (sorry, no picture) and didn't really change after adding the lemon. You then add the pectin and sugar, boil for a mere two minutes and get it into jars. Process for 10 minutes and you've got yourself a batch of incredible jelly.

Cooling jars
Aside from polishing off the small unprocessed jar that went straight to the fridge, I immediately gave my sister a big jar and have given a number of others away as gifts, so as I'm now readying items for this weekend's swap, I'm reluctantly assessing how many of these beauties I can part with. This stuff is like my own personal liquid gold after all.

Biting into jelly toast
Glowing like gems
Swap-ready

Wednesday, July 13, 2011

Plum Jelly Making with Mom

I grew up in Mill Valley, a town more filled with plum trees than most. Though my mom made plum syrup and jelly every year, and I helped with stirring and measuring sugar, when I was young I was more interested in eating the fruit right from the tree (best when harvesting included a risk such as getting caught by the owner or precarious climbing) or using the abundant cherry plums as ammo for the massive plum fights we kids would wage.

Remaining cherry plums in the front yard tree

As these things usually go, I now wish I had spent more time paying attention in the kitchen so I too could effortlessly whip up anything and everything like my mom does. Lucky me though, I can still catch up. So yesterday I rode the ferry over to the folks' place and set about making cherry plum jelly.

As much as I love being up in the trees, I got off easy this year as the plums had already been picked by my 6'3" cousin Tim visiting from Montana, and my mom had already boiled the plums, made syrup and drained the remaining fruit through cheesecloth overnight to produce the plum juice we'd use for the jelly.

So we got right to work! As you will see from the finished product below, my mom recycles her jars and seals them using wax instead of processing them to produce an airtight seal. The jars and lids had already been run through the washing machine, but we also boiled the lids in a saucepan for a few minutes and poured boiling hot water in the jars for further sterilization and to warm them up. After that we put the jars upside-down in the oven on low heat so they'd be dry and ready for the hot jelly pour.

Our recipe called for 4 cups of plum juice and 6 1/2 cups of sugar, though we used scant cups so it wouldn't be overly sweet so was probably more like 6 cups of sugar. After adding the sugar in, we heated together on medium heat, stirring fairly frequently to keep from burning.


My mom has always used Sure-Jell Certo Liquid Pectin, which we added once the sugar and juice were blended and warm before bringing the jelly to a roiling boil.

My mom stands by Certo Liquid Pectin

The boiling of jam can be a bit scary...it rises fast, and you need to stir pretty furiously and turn down the heat as needed to avoid a hot mess on your stovetop. Be sure you use a large enough saucepan and have potholders or gloves at hand to avoid burns.

Jam at a full boil
Boiling on lower temperature

After 1 1/2 minutes, we turned off the heat and let the jelly settle while we removed the jars from the oven.

Removing the warm jars from the oven

We then began pouring the jelly!

Filling the jars

Letting a skin form

Close-up of air bubbles

People have all kinds of ways for removing the air bubbles, but we just use a toothpick to pop the larger ones and kind of pull the bunches of bubbles together to then skim them off with a spoon. This is easier if you let the jelly set up just a little bit so a skin starts to form.

Removing air bubbles with a toothpick

As I was on air bubble removal patrol, my mom started heating the wax for the seals. She uses the below brand, and simply creates a makeshift pitcher from a tea can. See, you really don't need a lot of specialized kitchen gadgets!

Parowax

Double-boiler action with homemade pitcher

Pouring the wax seals

Ready for lids

Once we poured the wax seals and let them set up, we made sure there were no cracks or bubbles needing topping off, and put the lids on and admired the gorgeous finished product. What a beautiful color, right?

Finished plum jellies and some of the syrup

After our hard jelly work, we had lunch on the deck with my dad and all went for a celebratory pint at Mill Valley Beerworks, a family favorite down the street, before popping me on the ferry amid rainbows and foggy mist.

Mom at the bar
Rainbow ferry ride

And, to give this all a sweet finish, below is today's breakfast: french toast (uh-mazing made with Acme Citrus and Almond Brioche acquired after getting off the ferry) topped with plum syrup and fruit. Couldn't be better!

French toast with homemade plum syrup and fruit