Wednesday, October 5, 2011

Last Swap + Next Swap

Yes, it is October and I am just now getting to the post on our August swap...but, to my defense I went to Hawaii for 10 days right after the swap, and you know how the tropics can take their toll. [wink wink]

Before we dig in to recalling the summery swappables of August, get your calendar out and mark the date for our next food swap event on Tuesday, October 25th from 6:30 - 8:30 pm. Tickets (free) will be available starting at 6 pm on Tuesday, October 11th. Stay tuned to Facebook or Twitter for the event link.

Our August swap was hosted at EHS Pilates, a most excellent studio if you are looking for one. Being our third swap, it was exciting to see  and taste!  the evolving seasonality of things people were bringing and making. What could be more summery than Tomato-Nectarine Bruscetta Spread, Zucchini Relish and Plum Jams? And there was so much more...let me show you!


(Didn't have great light for photos, so had to use my flash which is a pet peeve of mine, so apologies in advance for image quality)

Spicy + Mild Muhammara by Angela
Edible Perfumes & Essences by Yosh
Chile Honey Spiced Nuts by Lisa
Nutella by Lia
Tomato-Nectarine Bruschetta Topping by Jenna
Fresh Made Ricotta by Jenna
Farmer's Cheese & Moroccan Pickled Lemons by Olga
Nam (Thai Fermented Pork Sausage) by Jim
Meyer Lemons from Sophia
Assorted Cookies by Laura
Chipotle Aioli by Stephanie
Mountain Apple Rings & Spiced Fruit Leather by Jennifer
Sorrel Pesto & Salmon Empanadillas (not shown) by Christina
Assorted Relishes, Jams & Chutneys by Susan
Infused Vodkas by Jessie
Assorted Pickles, Jams & Jellies by Yours Truly

And if all that good stuff hasn't whet your appetite enough, there are a few more pics, including potluck creations here. Also, if you have any additional photos from the August swap please send them to the swap email or add them directly to the Facebook album!

Swap Booty at home - oh yeah!
Coming soon: Meyer Lemon Lavender Marmalade made from the swap lemons and more!

Saturday, September 3, 2011

Jalapeño-a-go-go

I admit I may have overdone it a bit on the jalapeño front during a recent u-pick adventure with my friend Jennifer. Partly it was because we made our trip out to Brentwood a little late in the season, and in general there wasn't that much on offer that we could pick ourselves. After checking out a bunch of different farms, we scored and landed at Smith Family Farm. First off they have a fantastic farmstand if you're not up for hitting the fields. Great variety, top quality and very reasonable prices. They did have nectarines, peaches, chard, herbs and LOTS of peppers available for picking - and everything is $1 a pound! This is always the price for u-pick, and they stay open to December, with a rotation of seasonal crops available at different times. I'm thinking pomegranate season might just bring me out there again...

Anyhow, we walked the rows of peach and nectarine trees for awhile, mostly just enjoying the inland heat and chatting. Occasionally we added a couple of fruits to our buckets, but really they were still virtually empty by the time we hit the rows of lush peppers.

A fraction of my u-pick pepper haul
The first four rows of peppers (jalapeños, anchos, Anaheim and poblanos) we were warned were all hot. Even with the typically milder varietals mixed in, they said we were not to be fooled. They also had bell peppers and another sweet variety I can't recall. They were all beautiful though and with a few pickling recipes in mind, I just couldn't seem to hold back. I picked a peck of peppers just like you-know-who.

After getting some chard and fresh sage, we paid up. Mine was $10, which for the amount of produce I had was ridiculously awesome, but also meant I had at least a good 8 lbs of peppers!

We picked up some gorgeous heirloom tomatoes, garlic and pickling cucumbers from the stand and then drove off for a cold beer to compensate for all our "hard work".

Sweet Garlic Dills, Pepper Jelly & Pickled Jalapeños
Using a recipe from Ellie Topp's excellent book The Complete Book of Small-Batch Preserving which I had just gotten from the library, I turned my cucumbers into my first ever batch of Sweet Garlic Dills. Then I made a half batch of the Pepper Jelly I had gotten inspired by the Shibaguyz doing a live demo of during the Canning Across America Canvolution. Finally I turned a couple pounds of the abundant jalapeños into pretty looking pickled rounds.

That was Day 1 of jalapeños.

Day 2 had me set on making some Jalapeño Bread & Butter Pickles which I think the fabulous Well Preserved folks had recommended. After selecting more peppers from my stash, I washed them and then donned protective latex gloves. Never underestimate the potential pain of working with hot peppers! You may think they're not that hot or that it won't bother you, but slicing and deveining 2 lbs of them had me feeling it in my lungs and eyes just from the fumes. Luckily I had a chance to recover since my recipe came with a built-in four hour break while the salted peppers and onions chilled in the fridge. After that it was as simple as adding the spices, cooking a few minutes, putting them into jars, and processing in a water bath for 10 minutes. Oh, and let's not forget the most important step: standing back and admiring your work.

Freshly picked jalapeños
Salted & sliced
In the pot with spices
End result: Bread & Butter'd
I did have grand plans of making hot sauce, and roasting peppers, and all kinds of other good stuff with the remaining peppers, but had to turn my attention to other projects so into the dehydrator they went. I'm sure they'll find their way into an interesting recipe this winter though and will spice up a cold winter day or night just right.

Thursday, August 25, 2011

The Jam Diaries, Pt. 1

Dear Diary,

I have a confession. While I most definitely like jam — a lot, really — we just don't eat that much around our house. On my toast I tend to prefer just butter or the addition of something savory (and fatty) like cheese or ham. We do use it frequently for our stand-by dessert: plain yogurt with jam mixed in — but beyond that we tend to have jars rattling around the fridge for a good long time.

Garden full of roses at my sister's place
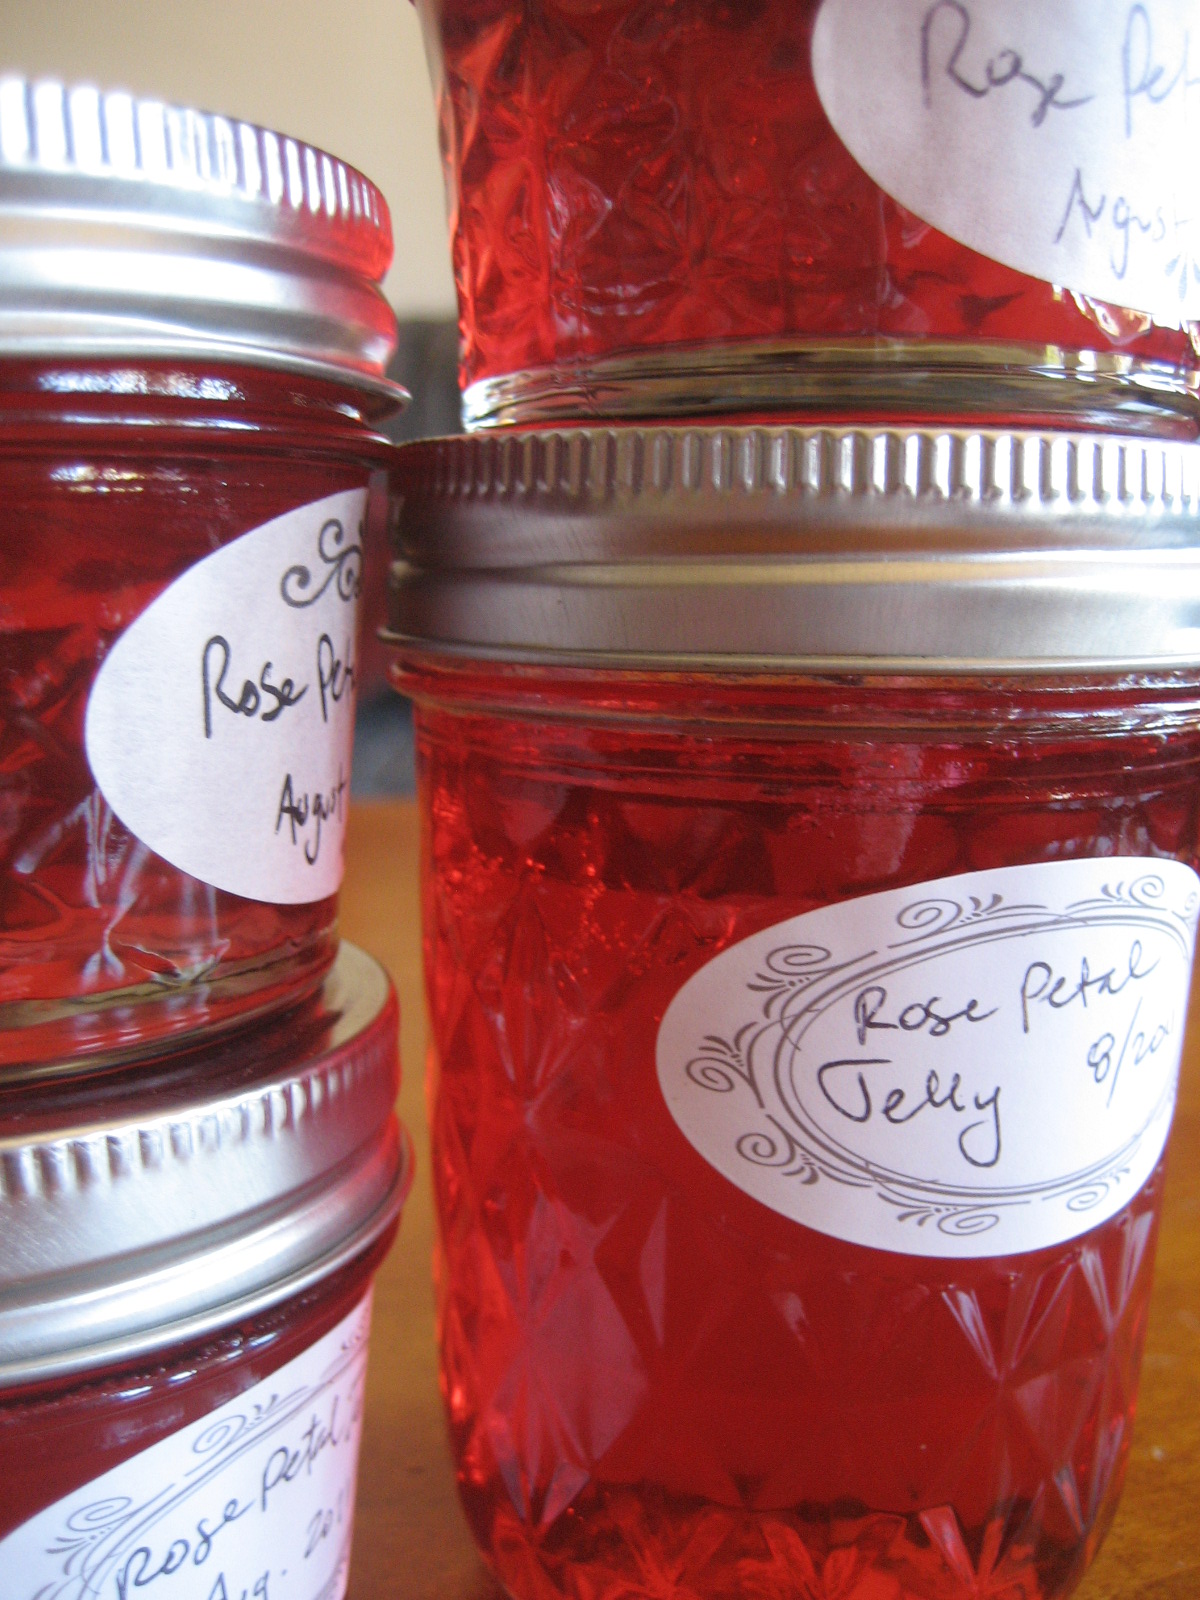
I have discovered the exception to this rule. As part of my recent jam/jelly-making mania, I found my secret sauce: rose petal jelly.

Inspired not least of all by the incredibly fragrant blue magenta roses that fill my sister's backyard in Berkeley, and by memories of floral jellies in France, I had been wanting to make something with roses for a while. After my sister brought me a bunch of roses, I did some online research and settled on this recipe - mostly because it required about the right amount of petals I had on hand.

Preparing the rose petals
A friend had also brought me a bouquet of garden flowers which included a gorgeous pink rose, so once I enjoyed its bloom for a few days, I added that into the mix. And my sister's harvest had included a single red long-stem rose that totally looked like it had come from a florist (but smelled divine) - key difference here being that it was grown in her yard, organically and without pesticides. This is crucial if you are using rose or flower petals for cooking - you must use pesticide-free ingredients!

After removing the petals from all the roses, you wash them and trim off the bottom white part of the petal which can turn your creation bitter if used. This is the kind of jelly prep you dream of right? Snip, into the measuring cup, voila.

After steeping the petals in boiled water for 10 minutes, you strain the liquid, squeezing every precious drop of fragrant goodness from the petals. Apparently your infusion can at this stage have turned a muddied color, which magically is transformed with the addition of the lemon juice, but mine was actually already a lovely red/pink color strangely evocative of Hawaiian Punch (sorry, no picture) and didn't really change after adding the lemon. You then add the pectin and sugar, boil for a mere two minutes and get it into jars. Process for 10 minutes and you've got yourself a batch of incredible jelly.

Cooling jars
Aside from polishing off the small unprocessed jar that went straight to the fridge, I immediately gave my sister a big jar and have given a number of others away as gifts, so as I'm now readying items for this weekend's swap, I'm reluctantly assessing how many of these beauties I can part with. This stuff is like my own personal liquid gold after all.

Biting into jelly toast
Glowing like gems
Swap-ready

Friday, July 22, 2011

Summer Fruit, 1-2-3

Summer is finally in full swing and I can't get enough fruit. And when I see a good price (.75/lb for stone fruit at the Civic Center Farmers Market this week!) I tend to to go a bit overboard. After fresh fruit and yogurt every morning, fruit as a snack, fruit in salads, baking cobblers, tarts etc., I find myself wondering what I else I can do with it all.

Ta-da, the American Harvest Snackmaster
Enter the fruit dehydrator, my latest kitchen addition which I scored for $20 on Craigslist. It even came with extra trays and fruit leather inserts, so I knew I had to break it in by making some fruit roll-ups.

The beauty of the dehydrator in general, and making fruit leather specifically, is you can use that slightly overripe fruit no problem. In fact the riper the fruit the sweeter the leather, plus you don't need to throw anything out because its gone a bit soft.

You can also totally experiment and use any fruit combination that strikes your fancy - blending together whatever you have on hand!

Making fruit leather really is as easy as 1, 2, 3.

#1 - Choose your fruit combinations, working with the following proportions: 3 cups fresh fruit, juice of half a lime or ~1 Tb lemon juice, ~1-2 Tb honey (or agave nectar) as needed.

You don't need much!
Here are some of the ones I made, varying the amount of honey to taste:
  • Cherries, plums, lemon juice, honey
  • Strawberry, mint leaves, balsamic vinegar
  • Papaya, strawberry, lime juice, agave nectar, lime zest
  • Peaches, strawberries, lime juice honey
  • Mango, strawberry, lime juice, mint, honey
  • Apricot, cherries, lime juice, honey, lime zest 
After washing and cutting away any heavily bruised parts, cut up fruit, add all ingredients to a blender and puree until smooth.

#2 - Spray fruit leather tray lightly with vegetable oil spray (Pam or canola work well) to prevent sticking. Pour mixture evenly into fruit leather trays and use a spatula or spoon to smooth out. Place tray in your dehydrator and dry at 130°-140° F until fruit feels leathery and there are no super sticky spots on the top or bottom.

Pour evenly into tray and smooth with a spatula or spoon
The length of time will vary depending on moisture, thickness, and the type of fruit you use as both the amount of pectin and the amount of sugar come into play. The type of dehydrator you have is of course a factor as well.*

The amount of pectin determines how well it will bond as a solid sheet when it dries.

Fruits naturally high in pectin include apples, apricots, blackberries, blueberries, guavas, peaches, pineapple, plums and more. Fruits naturally low in pectin include cherries, citrus fruits, melons, strawberries, raspberries and almost all vegetables. If you have a low pectin combo, you can always add a little applesauce to the mix to make sure it forms into a sheet well.

Fruit leather ready to be removed
A lot of sugar or sweetener in the puree will lengthen the drying time and potentially cause your leather to stick to the tray surface. This can be a real pain to remove, and of course mean you might end up with sheets which tear and break, which is no big deal in terms of the eating, but not so pretty for presentation.

Taste your puree once blended and add sweetener accordingly, but remember that it will become sweeter once dried.

The above combinations took between 10-12 hours, though I now realize I could have done them in considerably less time, but as a first-timer I was overzealous about the instructions of making sure there were no sticky spots (thus the rephrasing in my instructions above to no "super sticky" spots) and I did pour them quite thick. Still, though some of it first felt more like fruit brittle when it cooled down, it still tasted great and did became softer as it absorbed moisture from the air.

Cut sheets to desired size
#3 - Remove sheets from the dehydrator while leather is still warm and package into whatever size rolls you want with plastic wrap. Store in an airtight container.

I cut my sheets into thirds so that I could provide a variety of flavors per item for the food swap, plus each piece was equal to an entire cup of fresh fruit which seemed like plenty (though easy to forget when you're chomping down on this tasty treat)!

Fruit leather is a real joy not just because it's so simple and easy to adjust to whatever you have on hand, it also lends itself very well to experimentation. You can add yogurt into the mix and even use all kinds of garnishes such as coconut, sesame or poppy seeds, chopped nuts and dried fruit or granola (though refrigeration is recommended if you do this and aren't going to eat rolls right away).

My fruit leather trios at the swap
The next thing I want to try making is coconut wrappers...check out the crazy cool decorations you can create using vegetable juice and puree!

If you have any tried-and-true favorites or other innovations making fruit leather or using a dehydrator, please share as comments below or shoot me an email. This novice is hooked!

* Note: you can make fruit leather without a dehydrator if your oven can maintain an even and low oven temperature. See here and here.

Wednesday, July 13, 2011

Plum Jelly Making with Mom

I grew up in Mill Valley, a town more filled with plum trees than most. Though my mom made plum syrup and jelly every year, and I helped with stirring and measuring sugar, when I was young I was more interested in eating the fruit right from the tree (best when harvesting included a risk such as getting caught by the owner or precarious climbing) or using the abundant cherry plums as ammo for the massive plum fights we kids would wage.

Remaining cherry plums in the front yard tree

As these things usually go, I now wish I had spent more time paying attention in the kitchen so I too could effortlessly whip up anything and everything like my mom does. Lucky me though, I can still catch up. So yesterday I rode the ferry over to the folks' place and set about making cherry plum jelly.

As much as I love being up in the trees, I got off easy this year as the plums had already been picked by my 6'3" cousin Tim visiting from Montana, and my mom had already boiled the plums, made syrup and drained the remaining fruit through cheesecloth overnight to produce the plum juice we'd use for the jelly.

So we got right to work! As you will see from the finished product below, my mom recycles her jars and seals them using wax instead of processing them to produce an airtight seal. The jars and lids had already been run through the washing machine, but we also boiled the lids in a saucepan for a few minutes and poured boiling hot water in the jars for further sterilization and to warm them up. After that we put the jars upside-down in the oven on low heat so they'd be dry and ready for the hot jelly pour.

Our recipe called for 4 cups of plum juice and 6 1/2 cups of sugar, though we used scant cups so it wouldn't be overly sweet so was probably more like 6 cups of sugar. After adding the sugar in, we heated together on medium heat, stirring fairly frequently to keep from burning.


My mom has always used Sure-Jell Certo Liquid Pectin, which we added once the sugar and juice were blended and warm before bringing the jelly to a roiling boil.

My mom stands by Certo Liquid Pectin

The boiling of jam can be a bit scary...it rises fast, and you need to stir pretty furiously and turn down the heat as needed to avoid a hot mess on your stovetop. Be sure you use a large enough saucepan and have potholders or gloves at hand to avoid burns.

Jam at a full boil
Boiling on lower temperature

After 1 1/2 minutes, we turned off the heat and let the jelly settle while we removed the jars from the oven.

Removing the warm jars from the oven

We then began pouring the jelly!

Filling the jars

Letting a skin form

Close-up of air bubbles

People have all kinds of ways for removing the air bubbles, but we just use a toothpick to pop the larger ones and kind of pull the bunches of bubbles together to then skim them off with a spoon. This is easier if you let the jelly set up just a little bit so a skin starts to form.

Removing air bubbles with a toothpick

As I was on air bubble removal patrol, my mom started heating the wax for the seals. She uses the below brand, and simply creates a makeshift pitcher from a tea can. See, you really don't need a lot of specialized kitchen gadgets!

Parowax

Double-boiler action with homemade pitcher

Pouring the wax seals

Ready for lids

Once we poured the wax seals and let them set up, we made sure there were no cracks or bubbles needing topping off, and put the lids on and admired the gorgeous finished product. What a beautiful color, right?

Finished plum jellies and some of the syrup

After our hard jelly work, we had lunch on the deck with my dad and all went for a celebratory pint at Mill Valley Beerworks, a family favorite down the street, before popping me on the ferry amid rainbows and foggy mist.

Mom at the bar
Rainbow ferry ride

And, to give this all a sweet finish, below is today's breakfast: french toast (uh-mazing made with Acme Citrus and Almond Brioche acquired after getting off the ferry) topped with plum syrup and fruit. Couldn't be better!

French toast with homemade plum syrup and fruit